 Oct, 22 2025
Brake Pad Torque Calculator
This calculator provides recommended torque specifications for brake pad replacement based on your vehicle type and component. Correct torque is critical for safety and proper brake function.
Results
Enter vehicle type and component to see torque specifications.
For the most accurate results, always consult your vehicle's service manual.
When your car starts squeaking at low speeds, the first thing you wonder is whether you can swap the brake pads the friction material that presses against the rotor to slow the wheel on your own. The short answer is yes-if you have the right tools, a safe workspace, and a willingness to follow a clear step‑by‑step process. This guide walks you through every decision point, from checking wear to tightening the bolts, so you can finish the job without a mechanic’s bill.
Why DIY Brake Pad Replacement Makes Sense
Replacing brake pads yourself saves money, gives you confidence in your car’s safety, and lets you choose exactly the compound you prefer-ceramic, semi‑metallic, or organic. A typical shop charge runs $150‑$300 for parts and labor; buying the pads and doing the work can halve that cost. Plus, you get to see the condition of the rotors and calipers, catching problems before they become expensive repairs.
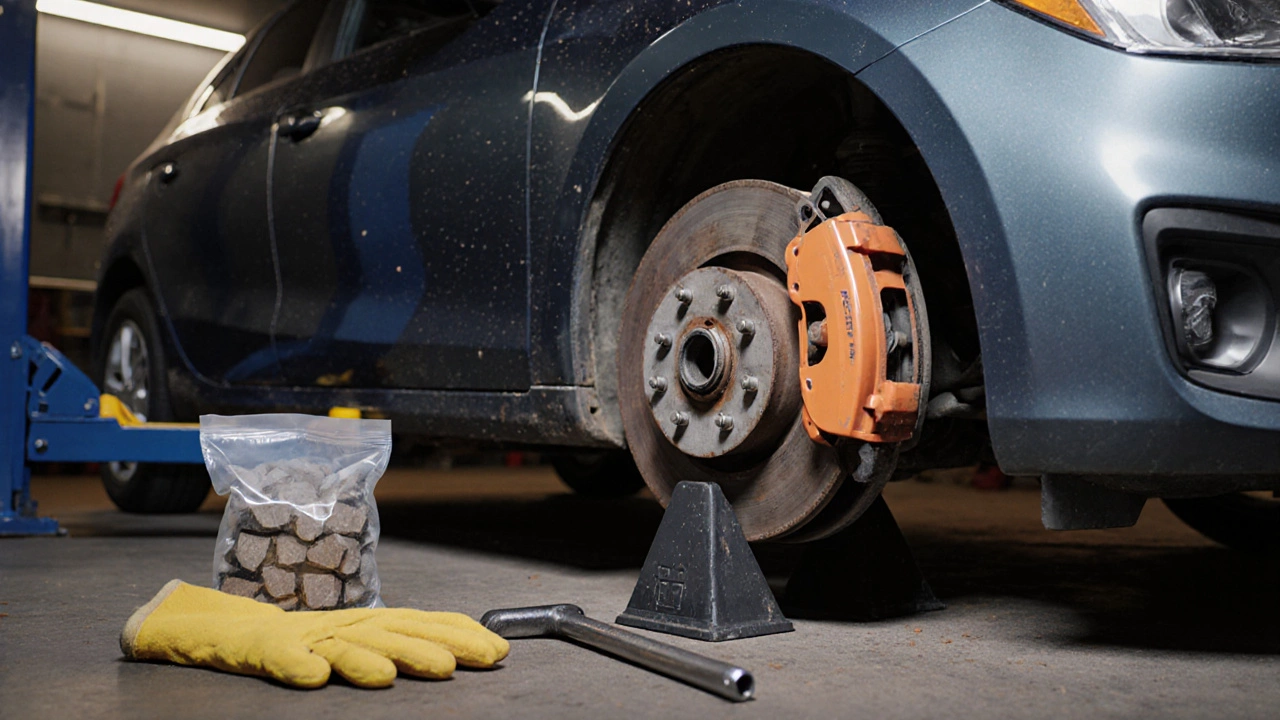
Tools and Parts Checklist
- Jack a hydraulic or scissor lift capable of raising the vehicle safely
- Jack stands heavy‑duty supports that keep the car stable while you work
- Torque wrench ensures bolts are tightened to manufacturer specifications
- Brake pad set (matched to make/model)
- Brake hardware kit (clips, pins, anti‑rattle shims)
- C‑line or brake fluid (check level after the job)
- Flathead and Phillips screwdrivers
- Brake cleaning spray
- Gloves and safety glasses
Step‑by‑Step Procedure
- Secure the vehicle. Park on a flat surface, engage the parking brake, and place wheel chocks behind the opposite wheels.
- Loosen the lug nuts on the wheel you’ll work on-don’t remove them yet.
- Lift the car with the jack and support it on jack stands. Remove the loosened lug nuts and set the wheel aside.
- Locate the brake caliper the housing that squeezes the pads against the rotor. Remove the caliper mounting bolts using the appropriate socket.
- Slide the caliper off the rotor. Support it with a hook or a piece of wire-never let it dangle by the brake hose.
- Take out the old brake pads. They usually sit in a bracket; pry them gently with a screwdriver if they’re stuck.
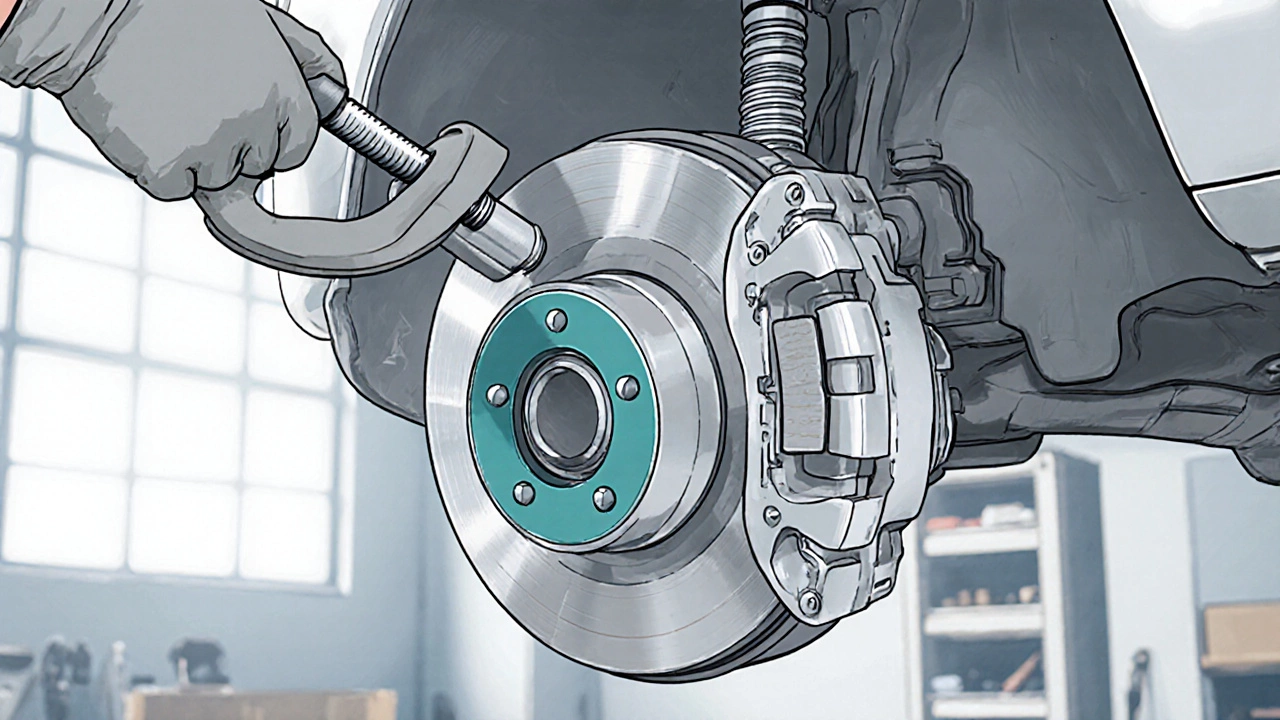
- Inspect the brake rotor the metal disc the pads clamp onto for scoring or rust. If the surface is uneven beyond the manufacturer’s tolerance (often 0.003 inches), consider resurfacing or replacing the rotor.
- Compress the caliper piston. For disc brakes, use a C‑clamp or a dedicated piston tool to push the piston back into the caliper housing. This creates space for the new, thicker pads.
- Install the new hardware kit-clips and pins go exactly where the old ones were. Place the fresh brake pads into the bracket, ensuring the hat (the large metal portion) faces the rotor.
- Re‑mount the caliper over the new pads, tighten the mounting bolts to the torque spec (usually around 30‑45 Nm, check your service manual).
- Put the wheel back on, hand‑tighten the lug nuts, lower the car, then torque the lug nuts in a star pattern to the recommended value (often 80‑100 Nm).
- Pump the brake pedal several times until it feels firm. This pushes the pads back against the rotor and restores hydraulic pressure.
- Check the brake fluid level in the master cylinder. Top up with fresh fluid if it’s low, then wipe away any spilled fluid.
- Perform a short test drive at low speed. Listen for any squeal, feel for pulling, and confirm that stopping distance feels normal.
Safety Tips You Can’t Skip
- Never work under a car supported only by a jack-always use jack stands.
- Wear gloves to protect your hands from sharp metal and brake dust, which can be hazardous if inhaled.
- Check the torque specifications for every bolt; over‑tightening can warp the caliper, while under‑tightening can let it wobble.
- Use only brake‑approved hardware; re‑using old clips can cause noise and premature wear.
- If you notice a fluid leak after re‑assembly, stop immediately and reseat the caliper piston.
Common Mistakes & How to Avoid Them
Skipping the piston reset. New pads are thicker, so the piston must be fully retracted. A partially reset piston leads to a dragging brake and overheating.
Re‑using old hardware. Clips and shims wear out and can cause squeaking. Always install a fresh kit.
Ignoring rotor condition. A cracked or heavily scored rotor can damage the new pads within minutes. Measure rotor run‑out with a dial indicator if you’re unsure.
Cross‑threading bolts. Use a hand‑tighten first, then apply the torque wrench-this keeps threads clean and prevents stripping.
When to Call a Professional
If the brake pedal feels spongy after the job, the caliper piston won’t retract, or you discover a leak in the brake line, it’s time to get a pro involved. Those issues often require bleeding the system or replacing a damaged component-tasks that need a pressurized brake bleeder.
Quick Reference Checklist
| Item | Why It Matters |
|---|---|
| Jack & Stands | Prevent vehicle collapse |
| Torque Wrench | Ensure proper bolt tension |
| Brake Pad Set | Provide reliable stopping power |
| Hardware Kit | Secure pads and reduce noise |
| Brake Fluid | Maintain hydraulic pressure |
Frequently Asked Questions
Can I replace brake pads on the front and rear wheels at the same time?
Yes, but it’s easier to do one axle at a time. Front brakes handle most stopping, so work on them first, then move to the rear after confirming the front feels solid.
Do I need to bleed the brakes after changing the pads?
Usually not, unless you opened the hydraulic line or the pedal feels spongy. Pumping the pedal several times after re‑assembly typically restores pressure.
How often should brake pads be inspected?
Most manufacturers recommend checking pad thickness every 10,000 km (6,000 mi) or at every tire rotation. Replace them once the friction material is 3 mm or less.
Can I use the same tools for drum brake shoes?
Some tools overlap, like the jack and stands, but drum brakes need a spring compressor and different hardware. It’s best to get a drum‑specific kit.
What’s the difference between ceramic and semi‑metallic pads?
Ceramic pads produce less dust and are quieter, but they’re usually pricier and may wear slower on high‑performance cars. Semi‑metallic pads offer stronger stopping power under extreme heat but can generate more dust.
Next Steps After a Successful Swap
Record the mileage and the part numbers you installed-this helps future maintenance and resale value. Store the old pads in a sealed bag; they can be recycled at many auto shops. Finally, keep an eye on the brake pedal feel for the first 100 km; any pulling or squeal means you might need to adjust the shims or re‑seat the caliper.
With the right preparation, swapping brake pads alone is a practical, confidence‑building DIY project. The money saved, the knowledge gained, and the peace of mind from a freshly serviced braking system are well worth the effort.