 Jun, 20 2025
Thinking about swapping your car’s entire exhaust system? Buckle up—this isn’t just a quick afternoon job for most folks. The time it takes shotguns from one to six hours, and that’s before you even factor in busted bolts or weird surprises under your car.
Let’s get one thing clear: “full exhaust” means you’re replacing everything from the manifold or headers, down the pipes and cats, right back to the muffler and tips. We’re not just talking a bolt-on axle-back that takes an hour. Forget shortcuts—if you want the whole thing out and a new one in, it’s a bigger deal. The clock keeps ticking every time you crawl under the car, reach for a stubborn bolt, or hit a snag with rusted parts.
- What a Full Exhaust Swap Involves
- DIY or Pro: Who's Faster?
- What Eats Up the Most Time
- Unexpected Hiccups You Might Face
- Time-Saving Hacks from the Garage
- Is It Worth Doing Yourself?
What a Full Exhaust Swap Involves
So, what does it actually mean to replace a full exhaust system? You’re not just ripping off a muffler and calling it a day. It’s practically a top-to-bottom overhaul underneath your car. The job starts right at the engine, with the exhaust manifold or headers, and goes all the way to the shiny tailpipe sticking out the back. Here’s what’s usually on the menu:
- Exhaust manifold or headers (right off the engine block)
- Downpipe (connects manifold to the rest of the system, sometimes includes turbo connections)
- Catalytic converter (your emissions control star)
- Resonator (optional, for noise control)
- Muffler (what actually quiets things down)
- Tailpipe (the visible part in the rear)
- All the gaskets, clamps, and hangers that hold things together and keep leaks at bay
Taking out the stock setup means unbolting sections, wrestling with old gaskets, and usually dealing with rusted or fused bolts, especially if your ride’s seen a lot of winters. If you’re in the Rust Belt, every nut can be stubborn. Some cars have sensors (O2 sensors, mainly) that you’ll need to unplug and re-thread into the new exhaust system.
Here’s a basic timeline (for a typical sedan) so you can compare how long each step tends to take if nothing goes wrong:
| Step | Average Time (minutes) |
|---|---|
| Lift car and prep | 20–30 |
| Remove old system | 40–90 |
| Prep new parts and gaskets | 20–30 |
| Install new system | 45–120 |
| Double-check, tighten, and test for leaks | 15–30 |
Add all that up and you’re looking at a realistic minimum of around 2.5 hours if you’re lucky and have power tools. It’s not rare for DIYers to spend all day, especially if they hit a snag.
DIY or Pro: Who's Faster?
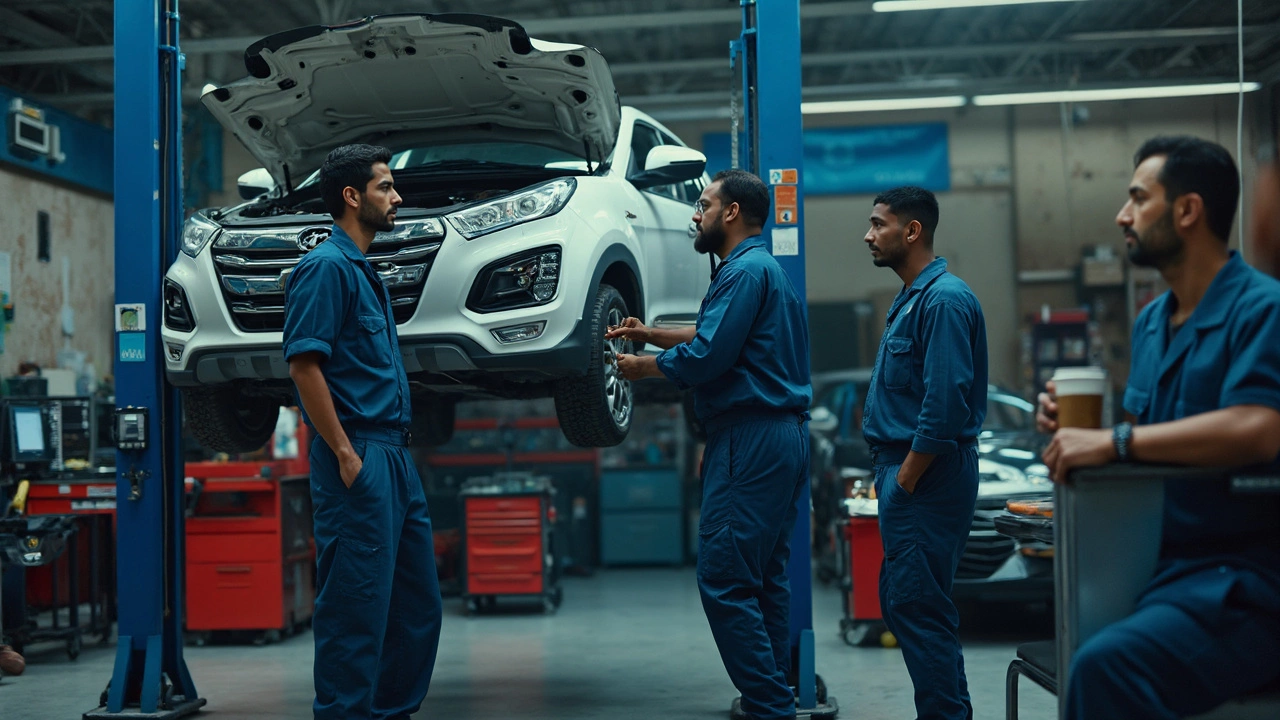
If you’re wondering who can finish a full exhaust system installation faster—DIY types or the pros—it’s not even close. Most professional shops with the right setup and tools can knock it out in about 2 to 3 hours, sometimes even quicker on trucks or newer cars with less rust. They use lifts, air tools, and have probably swapped dozens (if not hundreds) of exhausts before.
If you’re doing it yourself in the driveway, plan for a solid afternoon, and possibly the whole day. Here’s why: you’ll spend extra time jacking up the car, tracking down weird socket sizes, and dealing with those old, frozen bolts. Most people with basic tools and some experience report it takes anywhere from 4 to 6 hours—longer if you hit snags.
Here’s how the timing typically shakes out, based on real jobs:
| Installer | Usual Time (hours) | Typical Tools |
|---|---|---|
| Professional Shop | 2–3 | Lift, air tools, full toolbox |
| Experienced DIYer | 4–6 | Jack stands, basic hand tools |
| First-Timer DIYer | 6+ | Jack stands, basic hand tools, borrowed swear words |
Dealerships and performance shops work faster, but charge plenty for labor—sometimes more than the system itself. If you’re really after speed, stick with the pros; if you want to learn, save money, or just like getting your hands dirty, DIY isn’t a lost cause. Just know you’ll likely take twice as long, especially if you don’t have help or a power tool stash.
What Eats Up the Most Time
Not all steps in a exhaust system install take the same effort. The biggest time sink is almost always getting the factory gear off your car. No matter how fancy your tools, old exhaust parts love rust and they don't want to budge. If you’re working on anything older than five years, expect a good fight.
Here’s what usually drags things out:
- Rusty bolts and seized connections: Hitting stuck hardware with PB Blaster, heat, or even a sawzall can chew up over an hour—sometimes more if you're unlucky.
- Stubborn gaskets and old mounts: Sometimes rubber hangers turn to stone or gaskets weld themselves to the flanges. Chiseling these off is no picnic.
- Hard-to-reach spots: Some exhaust bolts are wedged near crossmembers or tucked behind heat shields. If you don’t have the right socket extensions, you’ll be fighting for space.
- Making sure nothing leaks: Lining up flanges, sliding on new gaskets, and tightening clamps until they’re just right takes some patience. A leak test can add extra time if you have to adjust things more than once.
Here’s a quick look at what usually eats up most of your hours, based on what you’re doing and the typical time each part of the swap takes:
| Step | Average Time (Minutes) |
|---|---|
| Loosening/removing factory exhaust | 45–120 |
| Prepping fit for new parts (cleaning, checking flanges) | 20–60 |
| Test-fitting new exhaust | 15–40 |
| Final bolting/welding and leak check | 20–45 |
| Total install time (DIY, typical garage) | 100–265 |
If you don’t have a lift and are crawling around on jack stands, tack on another 30 minutes—minimum. And watch out for wild cards, like snapped studs or stripped nuts. Those little headaches can mess up your whole timeline.
Unexpected Hiccups You Might Face
So, you’ve gathered your tools, jacked up the car, and you’re feeling confident about the install. But here’s where reality often steps in to slow things down—let’s talk about the most common speedbumps that pop up when tackling a full exhaust system swap.
The biggest culprit? Rusted hardware. Exhaust bolts, especially those near the manifold, love to seize up over time. If you live anywhere that gets snow or rain, add a good hour or more for dealing with frozen studs or bolts. You might even snap one off and need to break out the extractor kit—never fun.
Next up is broken or stripped studs. Phone calls to the parts store for replacement hardware are a rite of passage. And if you’re replacing everything back to the cats, those connections are often in tight, awkward spots, sometimes caked with grime you’ll spend ages scraping off.
Don’t forget old exhaust hangers. These rubber mounts look harmless, but they get rock hard after years under the car. Wrestling them off or struggling to squeeze your new pipes into them will burn more time than you’d think.
Here’s a look at how these headaches can impact your day:
| Problem | Extra Time (minutes) | Chance of Encountering |
|---|---|---|
| Rusted or stripped bolts | 30–90 | High (especially on older cars or in wet climates) |
| Stuck exhaust hangers | 10–30 | Medium |
| Snapped studs requiring extraction | 30–120 | Medium |
| Wrong or missing gaskets/hardware | 15–45+ | Common (if kit isn't complete) |
| Misaligned pipes/fitting struggles | 15–60 | Medium |
Pro tip: Always double-check that your new system came with fresh hardware and correct gaskets before you start. And if you can, hit all the old bolts the night before with penetrating oil—gives you a fighting chance when the big day comes. Having a buddy around helps big time when it’s time to wiggle pipes into crappy angles or knock loose a stubborn muffler. Nobody wants to spend their whole Saturday buttoning up issues that could’ve been avoided with a little prep and some muscle.
Time-Saving Hacks from the Garage
If you want to slash hours off your full exhaust system job, there are a handful of simple tricks that make a real difference. Nobody wants to get stuck under a car for longer than needed, so here’s what experienced wrenchers actually do to speed it up.
First up, don’t start cold. Spray penetrating oil (like PB Blaster or WD-40) on every bolt and nut involved—at least a day before you turn a single wrench. Rusted hardware is notorious for sucking up half your time on an exhaust swap. You can hit all the problem spots twice if you’ve got the patience.
- Get the car high enough for good clearance. Jack stands are fine, but a set of ramps or a lift changes the game. Room to move equals faster installs and fewer moments of frustration.
- Lay out all your tools and parts before you start. You don’t want to be halfway through and missing a 14mm deep socket or forgetting a new gasket. Double-check the kit for hangers, clamps, and fresh hardware.
- Have a breaker bar handy. Trust me, your standard ratchet won’t budge some of those ancient bolts. If you own—or can borrow—an impact gun, even better.
- Don’t skimp on new gaskets and hardware. Reusing old stuff can slow things down if you’re stuck dealing with leaks or stripped threads at the end. Most brands toss fresh bolts and gaskets in the kit, but check before you start tearing the old stuff out.
- If something’s being stubborn, give it some heat. A propane torch can help loosen the most rusted fasteners. Just keep it away from fuel and lines as a no-nonsense safety tip.
One tip you won’t see in every guide: Take photos before you remove each section. If your memory’s good, maybe you don’t need it—but piecing things back together in reverse order is smoother with a few reference pics.
Last, don’t toss the instructions. Even if you’ve done a couple of exhaust system swaps, every brand sets up a little differently, especially with hangers or O2 sensor placements. Having the paperwork at hand usually pays off. Old habits from the pros are all about thinking one step ahead, not working harder.
Is It Worth Doing Yourself?
If you’re thinking about handling a full exhaust system swap at home, you’ve got to weigh both your skills and your patience. The first big win is saving money—shops usually charge anywhere from $400 to $900 just for labor. That’s before even talking about the price of the exhaust parts, which can run from $400 for a basic system to $2,000 or more for high-end stainless or performance setups. DIY means you pocket that labor cash, and you get the satisfaction of doing it yourself.
But this isn’t your typical “change the oil” job. You’ll need the right tools: a jack and sturdy stands, a ratchet set, a decent breaker bar, maybe a saw for stuck pipes, and probably some PB Blaster to loosen up rust-welded bolts. If your car lives where roads get salted, expect bolts to put up a fight. And if you mess up and snap a stud, you’ll pay more in the end—a tow and extra shop hours add up fast.
Here’s a quick look at what people say about DIY versus shop install times and rough costs:
| Who Does the Job | Average Time | Typical Labor Cost |
|---|---|---|
| DIY (Home Garage, First Time) | 3-6 hours | $0 |
| DIY (With Experience) | 2-4 hours | $0 |
| Professional Shop | 1-2 hours | $400-900 |
If you’ve got a lift at home—or know a friend with one—the job goes way faster and easier. On your back in a driveway, plan for extra time, especially if this is your first go at a full setup.
- Want a performance boost or better sound? DIY lets you pick exactly what you want—no hard sell from a shop.
- Worried about warranty or emissions legal stuff? Some states will check your work, and a shop job comes with paperwork.
- If you get stuck, you might need special tools or a trip for missing gaskets or clamps. Factor in travel time to the parts store.
The takeaway? Doing a full exhaust system swap yourself saves serious cash and teaches you a lot, but it’ll test your patience if parts are seized up or things don’t fit right. If you’re new to car work or hate busted knuckles, a shop might be worth every penny.