 Mar, 14 2025
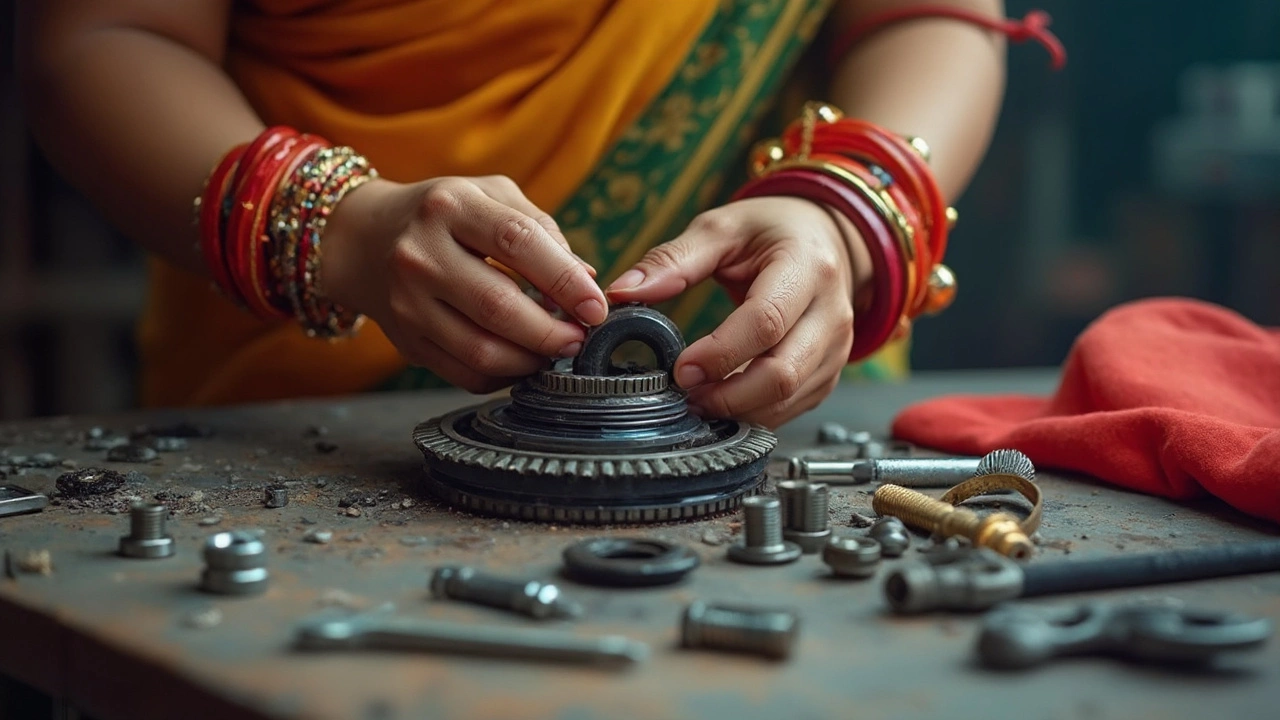
So you're thinking about installing a clutch kit? It's like a rite of passage for passionate DIY auto enthusiasts. But how hard is it really? Let's break it down. First, you'll need to get familiar with the basics: the clutch is a crucial part of your car's transmission system. It helps you smoothly connect and disconnect the engine from the wheels. When it's worn out, driving can get clunky and unpleasant.
Before you dive under the hood, consider this: a clutch kit installation isn't a simple job like changing your car's oil. It's a bit more complex. You've got to be ready with more than just basic tools. Plan for some elbow grease, patience, and maybe a few choice words when things don't go as planned. If you get squeamish about dust and grease, maybe enlist a buddy who's less put off by it.
One of the first things you'll need is space. Forget cramped quarters; you need to be able to move around the car. A garage with a lift is ideal, but a pair of sturdy jack stands can work. Remember, safety first! Proper support is non-negotiable.
- Understanding the Basics
- Tools You'll Need
- Challenges You Might Face
- Tips for a Successful Installation
Understanding the Basics
Alright, let’s get to grips with the basics of a clutch kit installation. If you're up for the challenge, this is the perfect starting point. The clutch kit is like the heart of your car's transmission system, allowing you to shift gears smoothly. Now, what’s included in a typical clutch kit? It’s usually made up of a clutch disc, pressure plate, and a release or throw-out bearing. Some kits also include a pilot bearing or bushing, which helps support the end of the transmission input shaft.
Why do you need to install a new clutch kit? Over time, the clutch components wear down—the friction material on the clutch disc gets thin, making shifts rough or causing slipping. If you’re noticing any grinding noises or if the clutch pedal feels soft, it might be time for a replacement.
Before ripping out the old stuff, you need to understand that each car is different. Whether it’s a compact sedan or a beefy truck, there are model-specific instructions you'll need to follow. But don't worry, the core principles remain the same!
What's Involved?
In a nutshell, replacing a clutch involves removing the transmission to access the clutch components. Here’s where things might get a bit hairy. It’s not just about installing a new clutch, but also ensuring every bolt and assembly is correctly aligned and torqued.
- Clutch Disc: Engages and disengages with the flywheel to change gears.
- Pressure Plate: Clamps the clutch disc against the flywheel.
- Throw-Out Bearing: Applies pressure to the pressure plate.
It's crucial to check that all components fit snugly. Installing even one part slightly off can cause issues down the road.
Fun Fact
Did you know that on average, a standard clutch kit can last anywhere from 30,000 to 100,000 miles depending on the vehicle and driving habits? So, factoring in how much you drive can give you an idea when a switch is imminent.
Stay tuned for more on the tools you'll need to get this job done. Spoiler: It’s a bit more than just a wrench and screwdriver!
Tools You'll Need
Diving into the installation of a clutch kit? You're going to need more than just your typical toolbox essentials. Let's get real here: having the right tools can mean the difference between a weekend project and a nightmare. So, what's the list? Let's break it down.
Basic Tools
Start with the fundamentals. You'll need a good set of wrenches and sockets. Metric sizes are pretty standard, but double-check your car's specifics. Keep a ratchet handy, too; it makes things ten times easier.
- Socket Set – Include both metric and standard sizes.
- Wrenches – Adjustable and a full-size set.
- Screwdrivers – Both Phillips and flathead types.
Specialty Tools
Here's where things get a bit more interesting. A transmission jack will be your best friend—it supports the weight of the transmission as you work. You’ll also find a clutch alignment tool invaluable for getting everything to fit just right.
- Transmission Jack – Essential for safe, easy lowering and lifting.
- Clutch Alignment Tool – Helps to align the clutch correctly.
- Pry Bar – For those moments when you need that extra leverage.
Safety Gear
Safety should never be an afterthought. You might be dealing with heavy parts and grime, so gloves are a must. Proper eye protection is non-negotiable, especially when things start flying—better safe than sorry.
- Gloves – Protect your hands from sharp edges and grime.
- Safety Glasses – Essential to protect your eyes during the job.
Helpful Extras
These aren't deal breakers but trust me, they can save a ton of stress. WD-40 helps with stubborn bolts. A creeper makes sliding under the car a breeze, and zip ties work wonders for organizing loose cables.
- WD-40 – For easing stuck parts.
- Creeper – Makes maneuvering under the car easier.
- Zip Ties – Keeps things tidy and cables in place.
By lining up these essential tools, you're setting yourself up for a smoother DIY ride. Got everything in order? Then you're ready to tackle that clutch kit like a pro.
Challenges You Might Face
Installing a clutch kit is not just about having the right tools—it's about readiness to tackle surprises. One major hurdle is figuring out your vehicle's specific setup. Every car may have its quirks, and clutch systems can vary, meaning there might be some unexpected parts or tools needed along the way.
Hidden Bolts and Tight Spaces
One of the biggest challenges is dealing with bolts in tight spaces. Accessing those small bolts hidden deep within the engine bay can be a real headache. Having a variety of wrenches in different sizes can save you a lot of frustration. Sometimes, just a flashlight and an extra set of hands can make all the difference.
Hefty Transmission Removal
Removing the transmission is a biggie. It's heavy and cumbersome, and you can't just yank it out. Properly supporting it while you're working is crucial. If you're not prepared for the weight, you might end up damaging other components or, worse, hurting yourself. A transmission jack or even a sturdy friend to help manage the weight during removal can ease the process immensely.
Lining Up Components
Another tricky part is ensuring everything lines up perfectly. This isn't just about trial and error. It's crucial to make sure everything is aligned and fits snugly, or you'll have bigger issues down the road. Use a clutch alignment tool to help with this; it can be a lifesaver for those precise fittings.
Time Commitment and Patience
A word of advice: block out plenty of time. This isn't a one-hour job, so rushing isn't an option. The task requires patience, especially when things don't go as planned. Taking breaks can help—just step back, grab a cold drink, and return with a clear mindset. Persistence is key, and a failure to take your time could lead to mistakes.
Overall, the challenges are plenty, but not impossible to overcome. With some patience, the right gear, and maybe even some help from a friend, you can successfully install a clutch kit and keep your ride running smoothly.
Tips for a Successful Installation
Getting that clutch kit installed just right is all about preparation and attention to detail. Here are some friendly pointers to make your installation smoother and less frustrating.
Check Your Parts First
Before you even grab a wrench, make sure you've got all the correct parts. It sounds basic, but you'd be surprised how often something's missing. Double-check your clutch kits against the purchase order. There's nothing worse than starting and realizing you're short a critical part.
Preparation is Key
Set yourself up for success. Organize your tools and parts. Keep a clean workspace. It might seem like overkill, but trust me, once you’re elbows-deep, you’ll thank yourself. Consider creating a labeled area for all the nuts and bolts you pull off.
Follow a Logical Workflow
The process will be much easier if you follow the right steps. Usually, the workflow looks something like this:
- Remove the negative battery cable for safety.
- Lift the vehicle and support it securely.
- Remove the transmission and old clutch components.
- Check the flywheel for damage—no point installing a clutch kit on a worn flywheel.
- Install the new clutch components and reattach the transmission.
- Reconnect everything carefully, ensuring all bolts are torqued correctly.
Use Proper Tools and Techniques
Don't cut corners with tools. Make sure you've got everything required. A torque wrench is crucial for ensuring bolts are tight enough without over-tightening. It’s tempting to use the standard socket set but don’t—proper tools like pilot bearings and alignment tools can save you at least one headache.
Trouble-shoot as You Go
If something feels off, it probably is. Listen to any strange sounds or see odd vibrations? Double-check your bolts, alignments, and connections before moving on.
Mind the Safety Aspects
Don't be a hero—always prioritize safety. All that under-car work is serious, so wear protective gear and ensure all lifting equipment is stable. Keep a fire extinguisher close. Sounds excessive? It isn’t.
Being methodical about this makes it less of a chore and more like a rewarding project. Plus, you get the bragging rights of having done it yourself! So roll up those sleeves—once you’ve got it done, it'll feel like you're driving a brand new car. Happy tinkering!